Here at beycome we recommend you hire a professional photographer to take your home photos. The reason for this is because we see SO MANY listings with really bad photos that the home owner took on their phone. In spite of our opinion, most of our users tend to continue to just do it themselves… and believe me, we get it! It’s a lot simpler to just quickly run around the house and get those photos yourself so you can complete your listing.
So if you’re going to do it yourself, we want to give you a few pointers on how to make those photos look amazing.
1. Clean, organize and pick up your home.
If your house doesn’t look good, there’s nothing your camera can do to fix that. De-clutter and de-personalize. Remove anything related to your pets, hide the soaps, shampoos and razors in the shower, hide your toothbrush, close the toilet seats, take unnecessary items off the walls and out of the rooms, and remove everything from your refrigerator. You want every space to look as big as possible. This doesn’t just apply to the inside. Spend time in your outdoor space doing the same things.

2. Now that your house is clean, you need to get it ready to photos.
Turn every light on in the house, and turn off every fan, TV and computer. Window coverings can be a little tricky. My advice is to open any window covering if the window has a nice view outside of it. If all you can see is the neighbors house, or a car parked in the street, partially close the blinds or shades so you can’t see out the window in the photo.

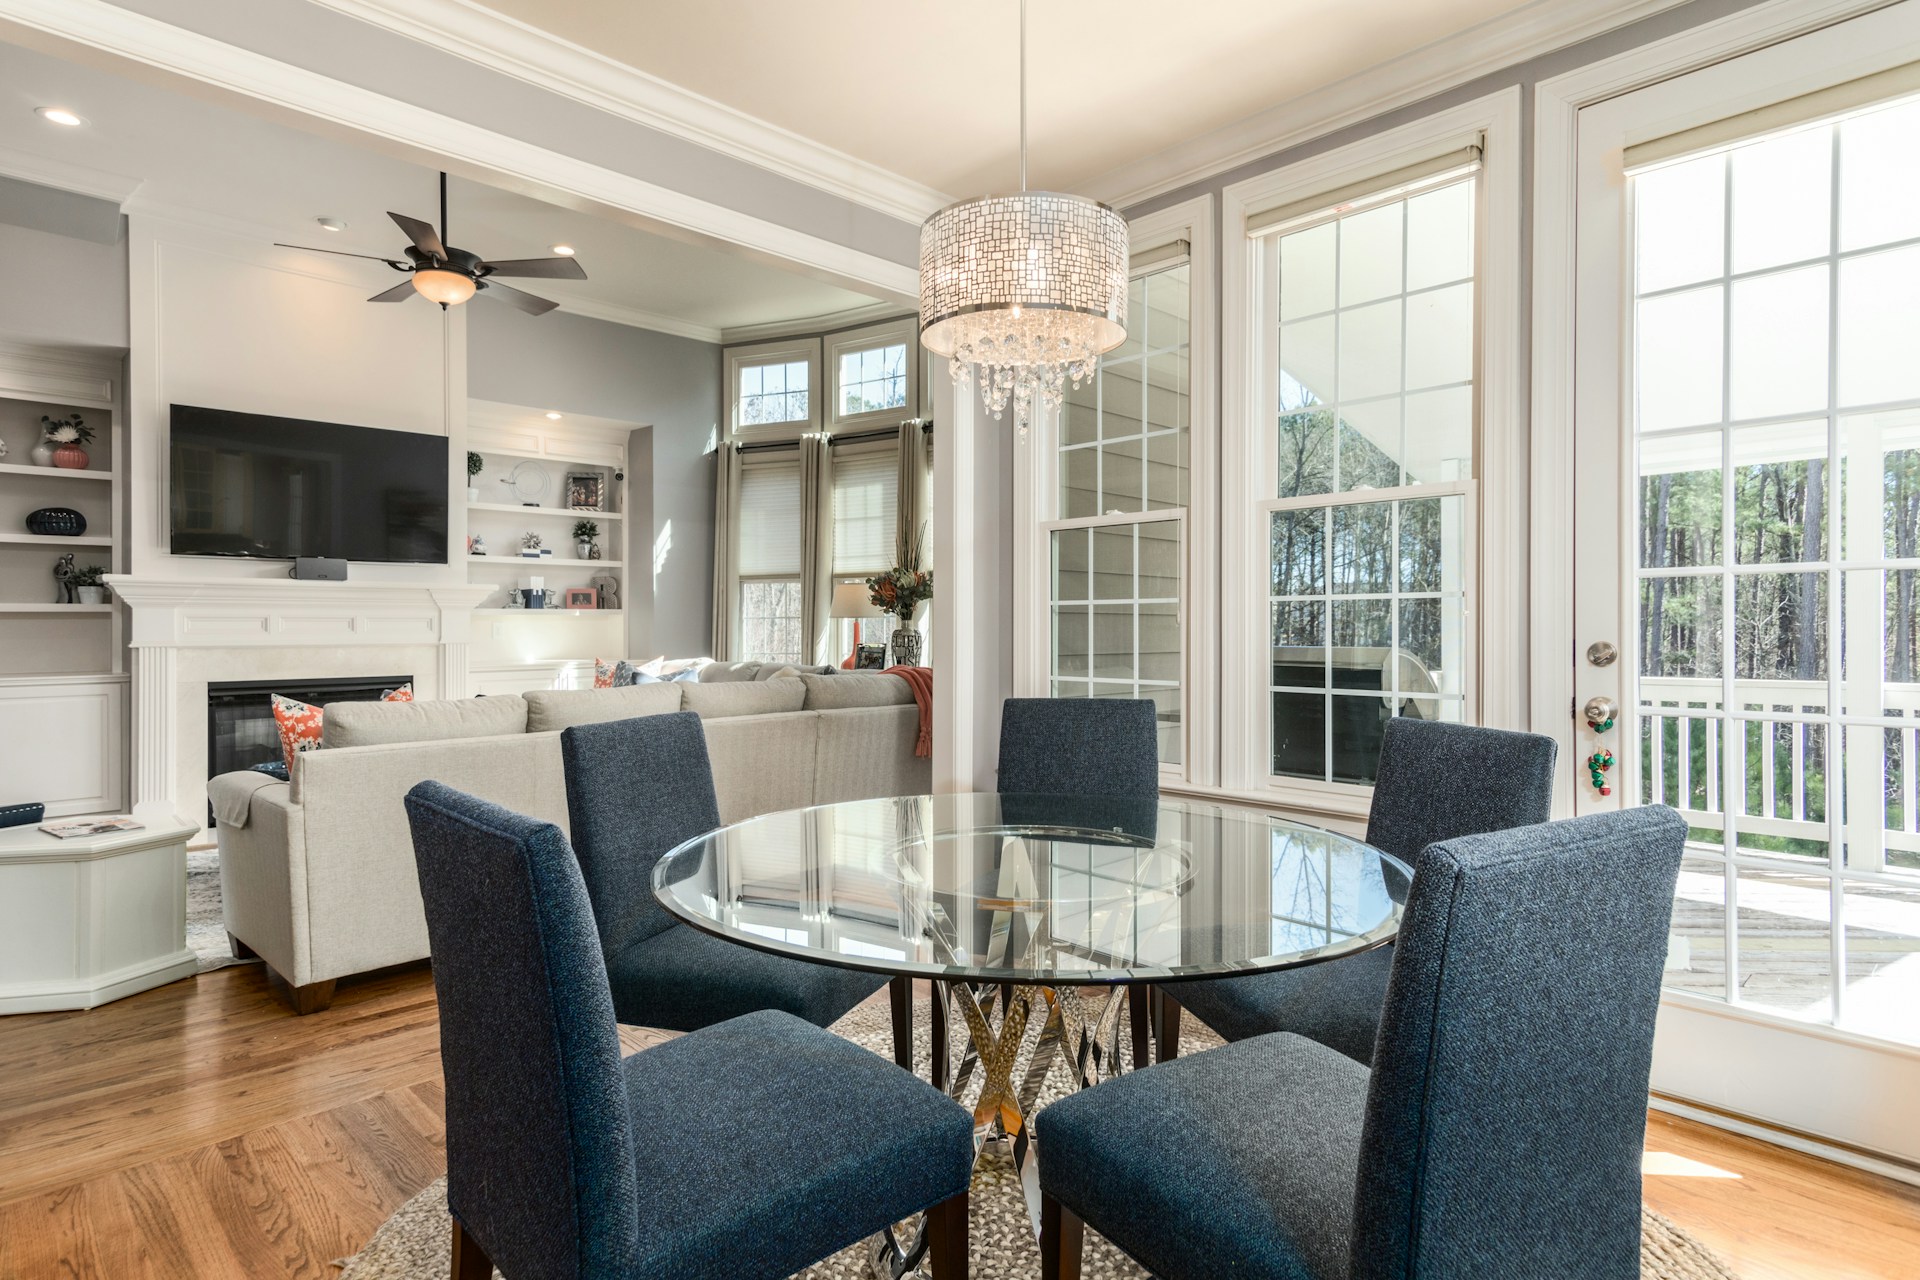
3. Hold your phone horizontally.
Most photos should be taken from the corners of the room. Hold the phone as level as possible, and try to keep it at an equal distance between floor and ceiling (8 foot ceiling means the phone is around 4 feet). Make sure the phone isn’t tilted forwards or backwards. Take a look at the examples below showing you what not to do.
Camera Height too high.

Camera Height too low.

Phone held vertically.

Camera not level.

Sell smarter
List your home on the MLS for $99
No listing agent, no 3% commission. Beycome handles your MLS listing so you keep more of what your home is worth.
Sell your home →Buy smarter
Get up to 2% back at closing
Buy any home with a Beycome agent and receive a rebate of up to 2% of the purchase price — paid to you at closing.
Buy a home →Here is the same photo is taken correctly—horizontal, equal distance between floor and ceiling, level phone, not tilted forward or backward.
4. The new iPhones have 3 lens options and I suggest using the .5 focal length if you have this feature. The wider, the better as it shows more of the room and makes a space feel larger. If you don’t have this option, stand as far into the corner of a room as possible and use your widest lens option.
2.5 focal length option

1x focal length option

.5 focal length option

5. The new phones do an amazing job of capturing the lighting both indoors and outdoors at the same time. However, it can still be a challenge to get photos where your home looks well lit. My first suggestion is to take the pictures just after the sun sets. You want it to be light outside, but you don’t want any harsh sunlight coming in through the windows. As I said before, ensure every light is on in the house. With an iPhone, you can hold down on the screen to lock the exposure, and then slide your finger up or down to lighten, or darken the photo. Remember the goal here is to make the room look bright, fresh and well lit.
6. The same rules apply for the exterior of the home.
Make sure you get at least three good shots of the front of your home from different angles. Grabbing a shot of the entry and front door is great, but make sure the majority are wide enough to capture your entire house.

7. My last tip is to take a lot of photos.
Different platforms have different rules when it comes to the number of photos you can post… but at minimum you want 25 great photos of your home. If you’re hurting for inspiration. When you see his photos, you may re-think doing the photos yourself!
I really hope this helps! All of us here at beycome are cheering you on and are here for you during your home sale process.