How to Paint the Exterior of a House

Gleren Meneghin

Few features of your home make an immediate visual impact like the exterior paint job. Superbly applied paint conveys your pride in your home and helps define its personality. HGTV.com walks you through the steps of painting the exterior of a house, from prep work through the finishing touches.

Original_painting-house-exterior-yellow-intro-sherry-rauh_s4x3.jpg.rend.hgtvcom.616.462

Step 1: Prep Your Surface

You may be tempted to get straight to the painting, but diligent prep work is critical to a professional-looking finish. According to Dan Lawson of Medallion Paint, “Ninety-five percent of good painting is having a good surface.”
Before painting a new house with a stucco exterior, let the stucco cure for at least 28 days. Paint will not adhere properly to uncured stucco and may appear chalky or dusty.
 If you’re in a hurry, here’s a tip from Richard Luks, construction manager for RSR Custom Renovations and Additions: “Keep the stucco wet by spraying it with a hose. If it’s washed daily, it can cure in a week to 10 days.”
If you are repainting an existing home, inspect the exterior walls and trim for chipping, peeling, mildew, and other imperfections. Kill off mildew by applying a chlorine bleach solution with a garden sprayer. Then pressure-clean the entire exterior to remove dirt and old paint that has come loose.
Original_painting-house-exterior-new-home-sherry-rauh-0_s4x3.jpg.rend.hgtvcom.616.462

Step 2: Caulk and Patch

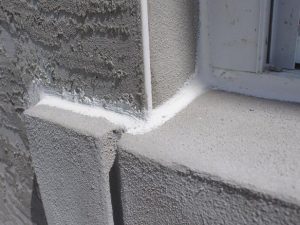
Before you pick up a paint roller, grab a tube of caulk. It’s vital to seal any cracks, as well as the joints where one type of exterior material meets another. This includes window frames, door frames, molding, and fascia boards.
If an old stucco surface has chips or pits, patch them with new stucco (and allow time to cure). Replace the wood siding or fascia boards that show signs of rotting. Gently sand wood trim and doors to ensure an ideal surface for painting.

Original_painting-house-exterior-caulking-sherry-rauh_s4x3.jpg.rend.hgtvcom.616.462

Step 3: Take Time to Prime

To get the most out of your paint job, prime with a quality sealer. “Sealer has high resin content,” Dan explains. “That goes over old paint, locks everything in place and creates a good surface for the new paint to adhere to.”

If you are repainting walls that have become chalky or dusty, select a chalky wall sealer. Paint will not stick to a dusty surface.
 As for new construction, latex primer works well for vinyl and most wood siding. If you’re working with stucco that is not fully cured, you can apply a hot stucco primer. This sidesteps the waiting period, allowing the surface to accept paint as soon as the primer dries. It’s best, however, to let stucco cure for the recommended time period if possible.
 In the drying process, the temperature has its own essential role according to painting experts, Improovy, the best temperature to paint outside is 40 to 90 degrees Fahrenheit, with an ideal painting temperature range of 50 to 70 degrees Fahrenheit.

Check the label on your primer or sealer to determine how long to wait before you begin painting.

Original_painting-house-exterior-priming-sherry-rauh_s4x3.jpg.rend.hgtvcom.616.462

Step 4: Choose Quality Exterior Paint

Good exterior paint is 100 percent acrylic latex. The formula consists of three main components:
– Pigments, which provide the color.
– Binders, which hold the pigment to the wall.
– Solvents, which make the paint spreadable. Today, most exterior paints are water-based.
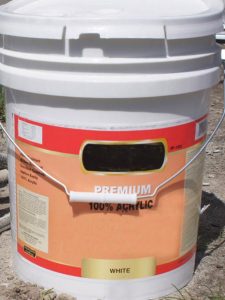
 As the paint dries, the solvent evaporates, leaving behind only the pigments and binders. These are known as volume solids. Higher quality paints are generally higher in volume solids. They may also have better binders, which will hold the pigments in place longer. This improves durability.
To determine the percentage of volume solids in a brand of paint, check the manufacturer’s website or ask your local distributor for a Technical Data Sheet. In general, paints labeled “premium” or “super-premium” are likely to be higher in volume solids than budget brands.

Original_painting-house-exterior-paints-sherry-rauh_s3x4.jpg.rend.hgtvcom.616.822

Step 5: Pick Colors With Curb Appeal

When it comes to color selection, there are so many choices that the decision can be overwhelming. If you’re not sure where to start, spend some time driving around your neighborhood to see what appeals to you. Keep in mind that vibrant colors will fade sooner than more muted ones.
 Be sure to consider the stylistic elements of your home — choose a color that complements your roofing material and any brick or stone accents. If you’re having trouble deciding between two shades, paint sample swaths on a section of your home’s exterior. Look at the result during different times of day to see which one you like best.

Before getting your heart set on a certain color, check with your neighborhood association and local building department to make sure there are no restrictions on paint colors in your area.

Original_painting-house-exterior-pastel-sherry-rauh_s4x3.jpg.rend.hgtvcom.616.462

Step 6: Spray and Roll

The ideal way to paint exterior walls is called spraying and back-rolling. This method requires two people. One uses a sprayer to quickly and evenly spread paint across the surface. The other person follows behind, running a roller over the paint that has just been sprayed on. This delivers an even finish, particularly on textured surfaces like stucco.
“This offers the best of both worlds,” Dan tells HGTV. “You get the speed of the sprayer and the evenness of the roller.” To protect your windows, cover them with plastic before you begin spraying, or use a sprayer with a shield.
 If your budget allows, apply a second coat after the recommended dry time. Muted colors cover better than bright ones. For vibrant shades, you may require a second coat just to get the full color.
“Two coats are always going to give you a better result,” Dan adds. “It evens everything out to put a better shell on your house. You’ll get more life out of the paint job with a second coat.”

Step 7: Finishing Touches

The last step is to paint the doors, fascia, molding, shutters, and other decorative details. The best tools here are “a steady hand and a good brush,” Richard says. You can save a little time by using 6-inch “hot dog” rollers to get the paint on quicker, particularly along the length of the fascia. But there are no shortcuts to a professional finish — you have to put in the time to get the best results.
 Depending on your climate, a superb paint job with top-of-the-line materials can hold up for as long as 10 years.

Happy painting!

Don’t feel like painting your house? Then you can always book a painter and leave the job to the professionals.

Source: hgtv.com

Leave A Reply